
Uploading your website files to hosting (cPanel)
Upload your site as a ZIP through cPanel's File Manager and extract it inside public_html.
Website files go in the public_html folder, which is what visitors see when they open your domain.
- 1Step 1
Zip your website
On your computer put all the website files in one ZIP file. It is much faster than uploading files one by one.
- 2Step 2
Open File Manager
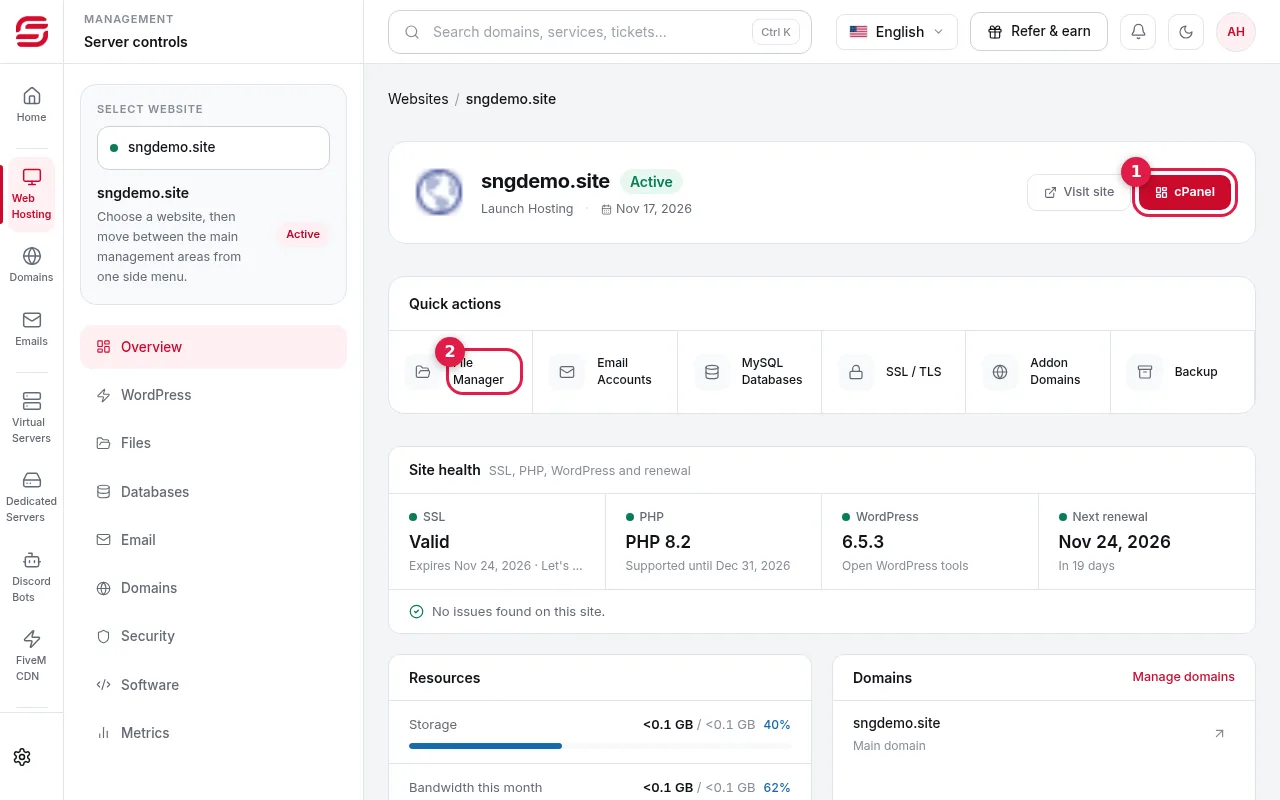
In the SNG control panel open Web Hosting → your website. Press File Manager (2) in Quick actions, or the cPanel button (1) and then File Manager. It opens in a new tab with no password needed.
- 3Step 3
Go to public_html
In the left tree, click public_html. If it contains a default index.html you do not need, delete it.
- 4Step 4
Upload the ZIP
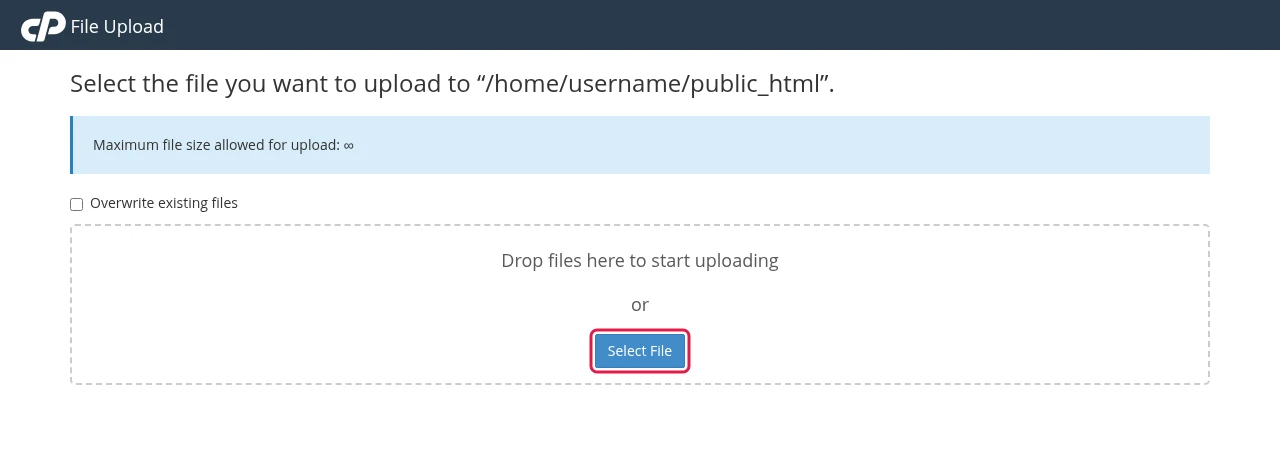
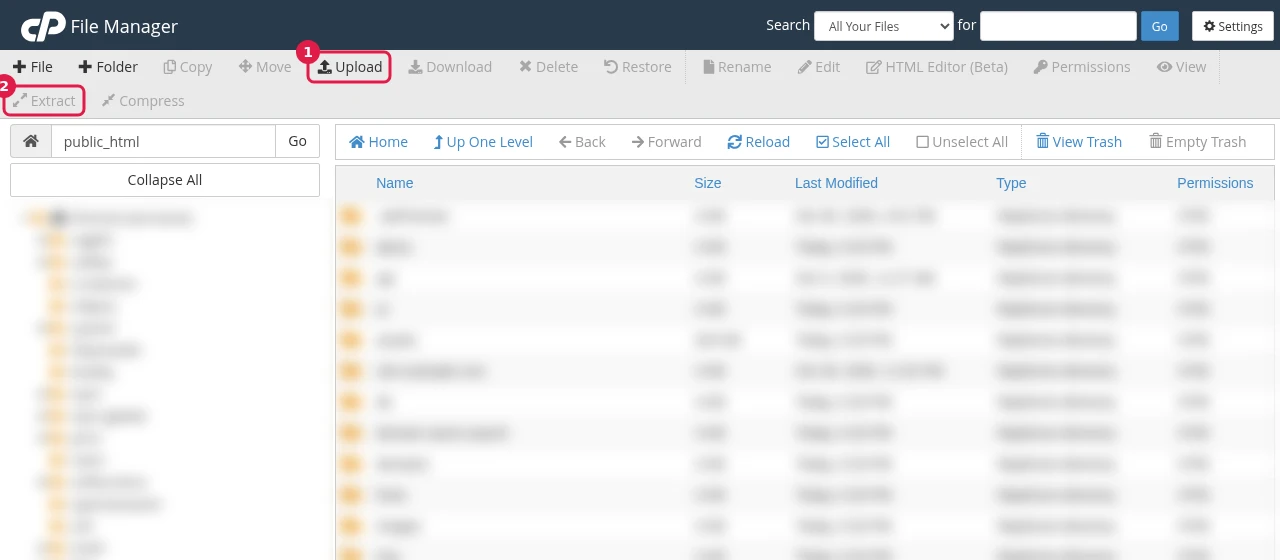
Press Upload (1) in the top bar. On the upload page, drag the ZIP file in or press Select File to choose it, wait until the bar reaches 100%, then press Go Back to return to the folder.
- 5Step 5
Extract it
Select the ZIP file and press Extract (2) in the top bar, or right-click it and choose Extract. Make sure the path is /public_html, then press Extract Files. Delete the ZIP afterwards.
- 6Step 6
Open your website
Open your domain in the browser. If you still see the old site, refresh the page or clear the browser cache.
Good to know
- Make sure index.html or index.php sits directly inside public_html, not in a sub-folder.
- For a new WordPress site, use Install WordPress instead of uploading files by hand.
- For every File Manager tool, see The complete guide to cPanel File Manager.
Steps didn't work for you? Our support team is available around the clock.